Articles > Installation and Configuration
Planning and preparation are essential steps when connecting a NVR camera system or IP camera system. To ensure a successful installation, consider the following key factors.
First, assess the number of uplink and LAN ports on both the PoE switch and NVR. The PoE switch should have sufficient uplink ports to connect it directly to the router or NVR. Additionally, the NVR should have enough LAN ports to accommodate all the cameras in the system. This will ensure that the system can handle the required data traffic.
Next, evaluate the strength and capability of the router. A strong router is crucial as it needs to handle the heavy data traffic generated by multiple cameras. Ensure that the router is capable of handling this load and has enough wireless or wired connections available.
Finally, consider the convenience of running a cable directly from the PoE switch to the NVR or router. This eliminates the need for additional adapters or extenders, reducing potential points of failure in the system. Running a direct connection also minimizes signal loss and ensures a stable and reliable connection.
In conclusion, thorough planning and preparation are crucial when connecting a NVR camera system or IP camera system. Consider factors such as the number of uplink and LAN ports, router capability, and the convenience of running a direct cable connection to ensure a successful installation.
Steps to Determine the Number and Location of Cameras Needed for a Surveillance System
1. Conduct a Property Assessment: Begin by assessing the property to identify vulnerable areas and critical points of interest. This assessment will help determine the potential areas where surveillance cameras will be most effective.
2. Identify Common Camera Placement Areas: Consider common areas where cameras are typically installed, such as entrances, parking lots, hallways, and high-value asset locations. These areas should be given priority for camera placement.
3. Minimize Blind Spots: Ensure that the camera layout is designed to minimize blind spots, which are areas that are not captured by any camera. This can be achieved by strategically positioning cameras to cover all angles and corners of the property.
4. Consider Lighting Conditions: Avoid interference from light sources, such as direct sunlight or strong indoor lighting, as it can affect the camera's image quality. Opt for cameras with built-in features like wide dynamic range (WDR) or infrared (IR) capabilities to overcome lighting challenges.
5. Mount Cameras High: Install the cameras at a height of at least 10 feet to provide a wide field of view and prevent tampering or vandalism. Mounting cameras high also helps reduce the risk of unwanted obstructions or damage.
6. Accessibility to Power Source: Ensure that the selected camera locations have a close proximity to an active power source. This will facilitate proper camera functioning and avoid the hassle of installing additional electrical wiring.
By following these steps, one can determine the number and location of cameras needed for a surveillance system effectively. Conducting a property assessment, considering common camera placement areas, minimizing blind spots, accounting for lighting conditions, mounting cameras high, and ensuring accessibility to power sources are crucial factors to be taken into account.
The surveillance area is meticulously laid out to ensure comprehensive coverage and effective security monitoring. To achieve this, the cameras are strategically placed throughout the designated area, with careful consideration given to their placement and viewing angles.
Starting with the camera placements, there is a series of cameras installed both indoors and outdoors. Outdoors, cameras are positioned at all entry and exit points, covering parking lots, perimeters, and surrounding areas. To eliminate any potential blind spots, additional cameras are strategically mounted at key angles and corners.
Indoors, cameras are positioned to monitor the key areas requiring close observation. These areas include entry points, hallways, stairwells, and rooms storing valuable assets. Each camera is adjusted carefully to achieve the optimal viewing angle. The aim is to capture a wide field of view while maintaining clear visibility of all objects and activities in the surveillance area.
The surveillance area is efficiently divided into different zones for better monitoring. These zones delineate specific areas, ensuring comprehensive coverage. Key areas that demand constant surveillance include high-security zones, valuable asset storage areas, and areas prone to potential security threats.
To avoid blind spots, cameras are carefully positioned and angled to overlap coverage areas. This overlapping ensures that no area is left unmonitored or obscured from view. Additionally, the surveillance area is well-lit, with adequate lighting arrangements in place to ensure clear visibility of all activities.
In conclusion, the surveillance area is strategically designed, with cameras placed to provide extensive coverage and clear viewing angles. Considerations like identifying key zones, avoiding blind spots, and ensuring proper lighting have been taken into account to enhance the overall effectiveness of the surveillance system.
Introduction:
Before troubleshooting any issues related to a device's power sources and network connectivity, it is vital to understand the importance of these factors. Power sources ensure that devices receive the necessary electricity to function, while network connectivity enables communication and access to various online resources. Problems in either area can directly impact the performance and functionality of devices, hindering productivity and causing frustration. Thus, it is essential to check power sources and network connectivity thoroughly when encountering any issues, as this step often helps identify and rectify common problems.
When choosing the right equipment for a CCTV system, there are several important factors to consider. The resolution of the cameras is crucial as it determines the video quality. Higher resolutions, such as 4K, provide clearer images and allow for better identification of objects and individuals. The sensor type is also important, with CMOS sensors being more common and less expensive, but CCD sensors offering better image quality.
It is also essential to consider the features and capabilities of the DVR/NVR (Digital Video Recorder/Network Video Recorder). These devices are responsible for storing and managing the recorded video footage. Look for features such as motion detection, remote viewing, and advanced search options. Additionally, consider the storage capacity of the device and if it can support multiple cameras.
Connectivity options are also worth considering, as they determine how the CCTV system can be accessed and integrated with other devices. Look for systems that support various communication protocols such as IP, HDMI, or Wi-Fi. This will allow for easy integration with other network devices or streaming to remote locations.
Lastly, it is crucial to select reliable and high-quality equipment. CCTV systems are designed to provide security and surveillance, so choosing equipment from reputable manufacturers ensures that the system will function effectively and efficiently. Consider factors such as durability, weather resistance, and warranty when making a purchase.
In summary, when choosing the right equipment for a CCTV system, factors such as resolution, sensor type, features, capabilities, connectivity options, and the overall quality and reliability of the equipment should be carefully considered. These factors will ultimately determine the effectiveness and performance of the system in providing the desired security and surveillance.
When it comes to selecting the appropriate IP cameras for indoor or outdoor use, there are several factors to consider. The different types of IP cameras available include dome cameras, bullet cameras, and PTZ cameras.
For indoor use, dome cameras are a popular choice. These cameras are typically ceiling mounted and provide 360-degree coverage. They are discreet and blend easily with the surroundings. Dome cameras are also vandal-resistant and weatherproof, making them suitable for indoor environments where there may be a risk of tampering.
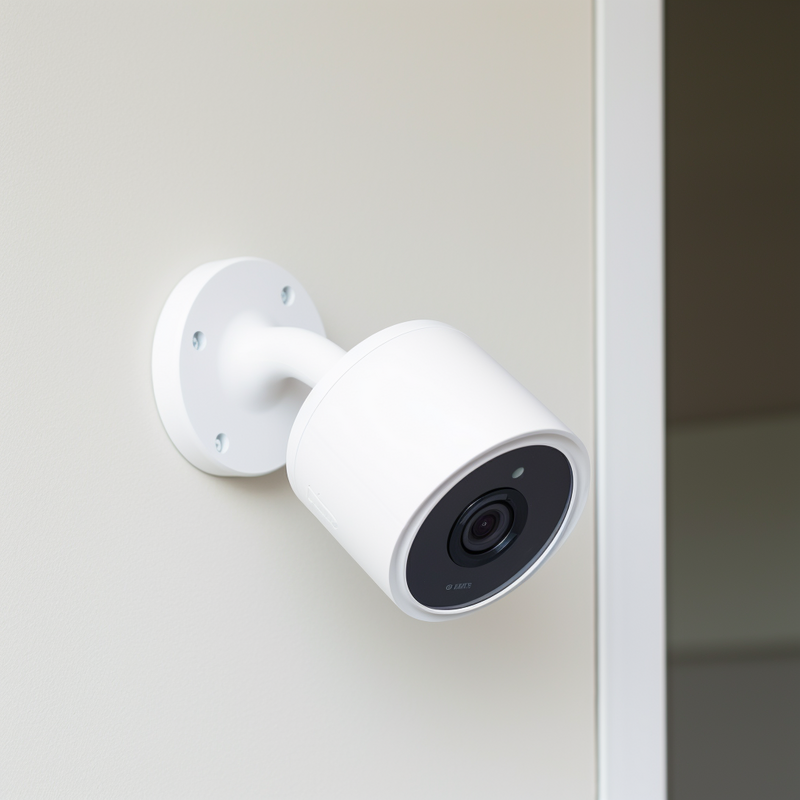
For outdoor use, bullet cameras are a common choice. These cameras are long and cylindrical in shape, providing a more visible presence. They are weatherproof and can resist harsh outdoor conditions such as rain and high temperatures. Bullet cameras also often come with infrared capabilities for better nighttime visibility.
PTZ (pan-tilt-zoom) cameras are versatile and can be used both indoors and outdoors. These cameras can be remotely controlled to pan, tilt, and zoom in on specific areas of interest. PTZ cameras often have a higher level of weatherproofing and vandal resistance to withstand outdoor conditions.
When selecting the appropriate camera for each environment, it is important to consider factors such as weatherproofing, vandal resistance, and temperature tolerance. For outdoor use, the camera should have a high IP rating to ensure it is protected against dust and water. Vandal-resistant features are important in areas where the camera is at risk of vandalism. Additionally, the camera should have a temperature tolerance suitable for the local climate to prevent damage or malfunction. Taking these factors into account will help ensure that the chosen IP camera is suitable for its intended environment, whether indoors or outdoors.
Wireless cameras offer numerous benefits when it comes to installation flexibility. These cameras leverage the Wi-Fi network in your home or business to create a surveillance network, which makes them ideal for monitoring small to medium-sized rooms and buildings.
One of the major advantages of wireless cameras is their easy remote access feature. With these cameras, you can simply connect to the Wi-Fi network and access the live feed from anywhere, anytime using a smartphone or computer. This allows you to keep an eye on your property even when you are not physically present, increasing your peace of mind.
Moreover, wireless cameras are much easier to install as compared to traditional wired cameras. They do not require any complex wiring or extensive drilling, making the installation process hassle-free. This not only saves time but also reduces the cost of installation.
Additionally, the use of wireless cameras eliminates the need for running cables across your property, providing a cleaner and more aesthetically pleasing surveillance system. This is particularly beneficial in scenarios where running wires through walls or ceilings is not practical or desirable.
In conclusion, wireless cameras offer numerous advantages including installation flexibility, easy remote access, simpler installation process, and reduced wiring. These features make them a reliable and convenient option for those looking for efficient and effective surveillance solutions.
Introduction:
When it comes to selecting the right camera for your surveillance needs, considering power over ethernet (PoE) capability can offer numerous advantages. PoE allows for both power and data to be transmitted over a single cable, simplifying installation and reducing the number of wires required. This feature eliminates the need for separate power sources, making it an ideal solution for remote or hard-to-reach locations where access to electrical outlets may be challenging. In addition to its convenience, PoE cameras provide better reliability and scalability, as they can easily integrate with existing network infrastructure. This introduction will explore the benefits and considerations of opting for cameras with power over ethernet capability.
Setting up the network infrastructure for IP camera installation requires careful planning and a step-by-step approach. Follow these steps to ensure a successful installation:
1. Planning the Network: Assess the camera requirements and determine the number, location, and coverage area for the cameras. Consider factors such as power sources, network connectivity, and any additional requirements.
2. Choosing the Right Equipment: Select suitable IP cameras that meet the desired specifications, such as resolution, functionality, and budget. Additionally, choose a network switch that can handle the data traffic from the cameras, ensuring sufficient bandwidth.
3. Camera Installation: Physically install the IP cameras at the specified locations, taking into account factors such as mounting brackets, power supplies, and network connectivity. Ensure proper alignment and adjust the camera angles for optimum coverage.
4. Configuring the Cameras and Network Settings: Connect the cameras to the network switch and configure their IP addresses, ensuring they are on the same network as the viewing software. Set up other camera settings like resolution, frame rate, and motion detection, based on the desired requirements.
5. Setting up the Network Switch: Configure the network switch according to the camera specifications, ensuring adequate power and bandwidth. Assign VLANs or subnets to segregate the camera traffic, enhancing network security and management.
6. Configuring the Network: Configure the router to assign IP addresses, enable port forwarding for remote viewing, and ensure proper firewall settings. Test the network connectivity between the cameras, switch, and viewing software.
7. Installing Viewing Software: Install the necessary viewing software on a computer or mobile device. Configure the software to connect to the cameras using the assigned IP addresses and access the live feed.
By following these steps, the network infrastructure for IP camera installation can be efficiently set up, ensuring a reliable and secure surveillance system.
In order to ensure a stable internet connection for remote monitoring, it is crucial to have a separate, high-quality internet router. This is of utmost importance as using the router provided by the Internet Service Provider (ISP) may lead to communication issues.
The router provided by the ISP is often not equipped to handle the large amounts of video data that are typically transmitted during remote monitoring. As a result, the connection may become unstable, leading to delays or even dropped connections. This can severely affect the effectiveness of remote monitoring as real-time video data is crucial for effective surveillance.
The consequences of an unstable internet connection for remote monitoring can be significant. It can lead to missed or delayed alerts, which can result in security breaches or other critical incidents going unnoticed. Moreover, an unstable connection can cause glitches and distortions in the video feed, making it difficult to interpret the footage accurately.
To ensure a reliable connection for remote monitoring, investing in a separate, high-quality internet router is highly recommended. This will provide the necessary bandwidth and stability to handle the demands of remote monitoring, ensuring smoother communication and better overall effectiveness.
In conclusion, a stable internet connection is vital for effective remote monitoring. By having a separate, high-quality router, one can avoid communication issues and ensure a reliable connection for smooth and efficient surveillance operations.
To configure static IP addresses for each camera, you need to follow the steps below:
1. Access the camera's web interface: Connect the camera to your computer or local network using an Ethernet cable. Open a web browser and enter the camera's IP address in the address bar. This IP address can usually be found in the camera's user manual or on a label on the camera itself.
2. Locate the network settings section: Once you have accessed the camera's web interface, navigate to the network settings section. This can usually be found under the "Setup" or "Network" tab.
3. Assign a static IP address: In the network settings section, look for the option to configure the IP address. Choose the option to assign a static IP address and enter the desired IP address. Make sure the IP address you assign is unique and does not conflict with any other devices on your network.
4. Set the subnet mask: Along with the IP address, you will also need to set the subnet mask. This can usually be found in the same network settings section. Enter the appropriate subnet mask for your network.
5. Enter the gateway and DNS server: In the network settings section, you will also find fields for the gateway and DNS server. Enter the relevant information provided by your network administrator or Internet service provider.
6. Save the settings: Once you have entered all the necessary information, click the save or apply button to save the settings. The camera will now have a static IP address assigned to it.
By following these steps and ensuring that the assigned IP addresses are unique, you can successfully configure static IP addresses for each camera. This will help in easily identifying and accessing the cameras on your network.
Introduction:
In today's digital age, the demand for high-quality video feeds has surged exponentially. Whether it is for conducting video conferences, live streaming events, or simply enjoying online video content, a strong network bandwidth is vital to ensure a smooth and uninterrupted viewing experience. Testing network bandwidth becomes crucial to determine if the existing network can support the required video feeds. This process helps identify any potential bottlenecks or limitations, allowing for necessary optimizations to be made, such as upgrading network infrastructure or adjusting video quality settings. By accurately assessing network bandwidth, organizations and individuals can ensure seamless video streaming and communication, thereby enhancing productivity, user satisfaction, and overall user experience.
When connecting a home CCTV security camera, the power supply considerations are crucial to ensure uninterrupted surveillance and protection. One key factor to consider is the stability and reliability of the power source. It's important to have a consistent and dependable power supply to ensure the camera system operates efficiently.
In case of sudden power cuts, having a high-capacity battery backup or a generator is essential. During power outages, the camera system may become non-operational, leaving the property vulnerable to security threats. A high-capacity battery backup provides temporary power to keep the cameras functioning until electricity is restored. It is advisable to invest in a battery backup system that can sustain the camera system for at least 24 hours.
Alternatively, a generator can be used as a backup power source. Generators are capable of providing continuous power for an extended period, ensuring uninterrupted surveillance. It is crucial to select a generator with sufficient capacity to support the power requirements of the CCTV system. The generator should be connected to an automatic transfer switch that detects power outages and seamlessly switches to generator power, reducing downtime.
In conclusion, when connecting a home CCTV security camera, power supply considerations are important. It is advisable to have a high-capacity battery backup or a generator in place to mitigate the impact of sudden power cuts, ensuring continuous surveillance and protection.
When determining the power sources for each camera location, several factors need to be considered to ensure continuous camera operation. The proximity of each camera to an active power source and the availability of a suitable mounting material are crucial aspects to be taken into account.
For camera locations near an active power source, such as a power outlet or an electrical panel, connecting the camera directly to this power source is the most efficient choice. This option provides a reliable and accessible power supply, minimizing the risk of power outages or disruptions. However, it is essential to ensure that the power source can handle the additional load and that the necessary electrical safety measures are in place.
In situations where the camera is far from an active power source, alternative power sources can be explored. These include solar panels, batteries, or power over Ethernet (PoE) solutions. Solar panels are particularly suitable in outdoor spaces with abundant sunlight, providing a sustainable and independent power supply. Batteries, on the other hand, can be used when a continuous power source is not feasible, ensuring uninterrupted camera operation.
Additionally, the availability of a suitable mounting material should be considered to secure the camera in its desired location. Mounting brackets or poles should be able to support the weight of the camera and withstand environmental conditions such as wind, rain, or extreme temperatures.
In conclusion, when determining power sources for each camera location, it is important to prioritize the accessibility and reliability of the power source to ensure continuous camera operation. Proximity to an active power source, along with the availability of suitable mounting materials, plays a vital role in maintaining an efficient surveillance system.
of IP cameras. PoE switches or injectors can greatly simplify the installation process of IP cameras by providing both power and data transmission over a single cable.
One of the main benefits of using PoE switches or injectors is the ease of installation. Traditionally, installing IP cameras required running separate power cables and network cables, which could be time-consuming and complex. However, with PoE switches or injectors, only one cable is needed for both power and data transmission. This not only reduces the time and effort required for installation but also eliminates the need for additional power outlets near the camera locations.
PoE switches or injectors are capable of delivering power and data simultaneously, making them ideal for IP cameras. They comply with standards such as 802.3af or 802.3at, ensuring correct power delivery. This ensures that the IP cameras receive the necessary power without overloading or underpowering them, thus preventing any potential damage.
By using PoE switches or injectors, it becomes much easier to expand or reposition IP cameras in the future. Since power and data are transmitted over a single cable, relocating or adding cameras to the network simply requires extending the Ethernet cable to the desired location, without the need for additional power sources or complex wiring.
In conclusion, utilizing PoE switches or injectors for the installation of IP cameras offers numerous benefits. They simplify the installation process by combining power and data transmission into a single cable, provide correct power delivery according to established standards, and make it easier to expand or reposition cameras in the future.
 Author: Sarah Howard